Why Revit MEP Modeling Services & MEP BIM Are Important in Modern Construction

Why Revit MEP Modeling Services & MEP BIM Are Important in Modern Construction

Why Revit MEP Modeling Services are the Backbone of Modern Construction

In the past, constructing a building was a game of architectural blueprint supremacy. The structure was drawn, the concrete was poured, and then mechanical, electrical, and plumbing (MEP) contractors were left to fight for space in the ceilings and walls.

The result? Costly onsite re-work, delayed timelines, and a lot of finger-pointing.

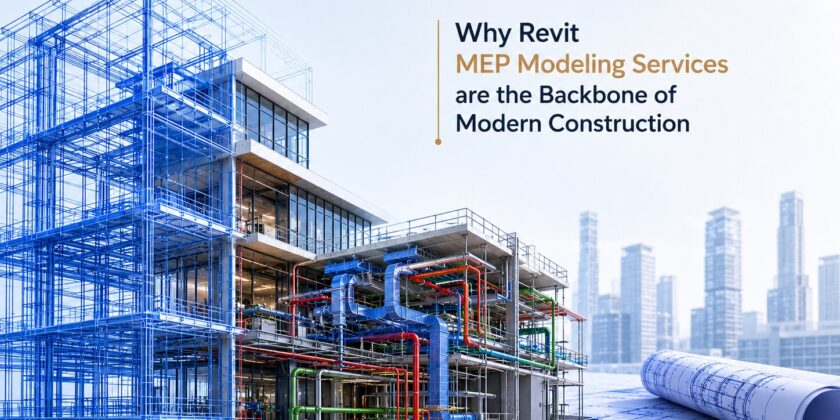
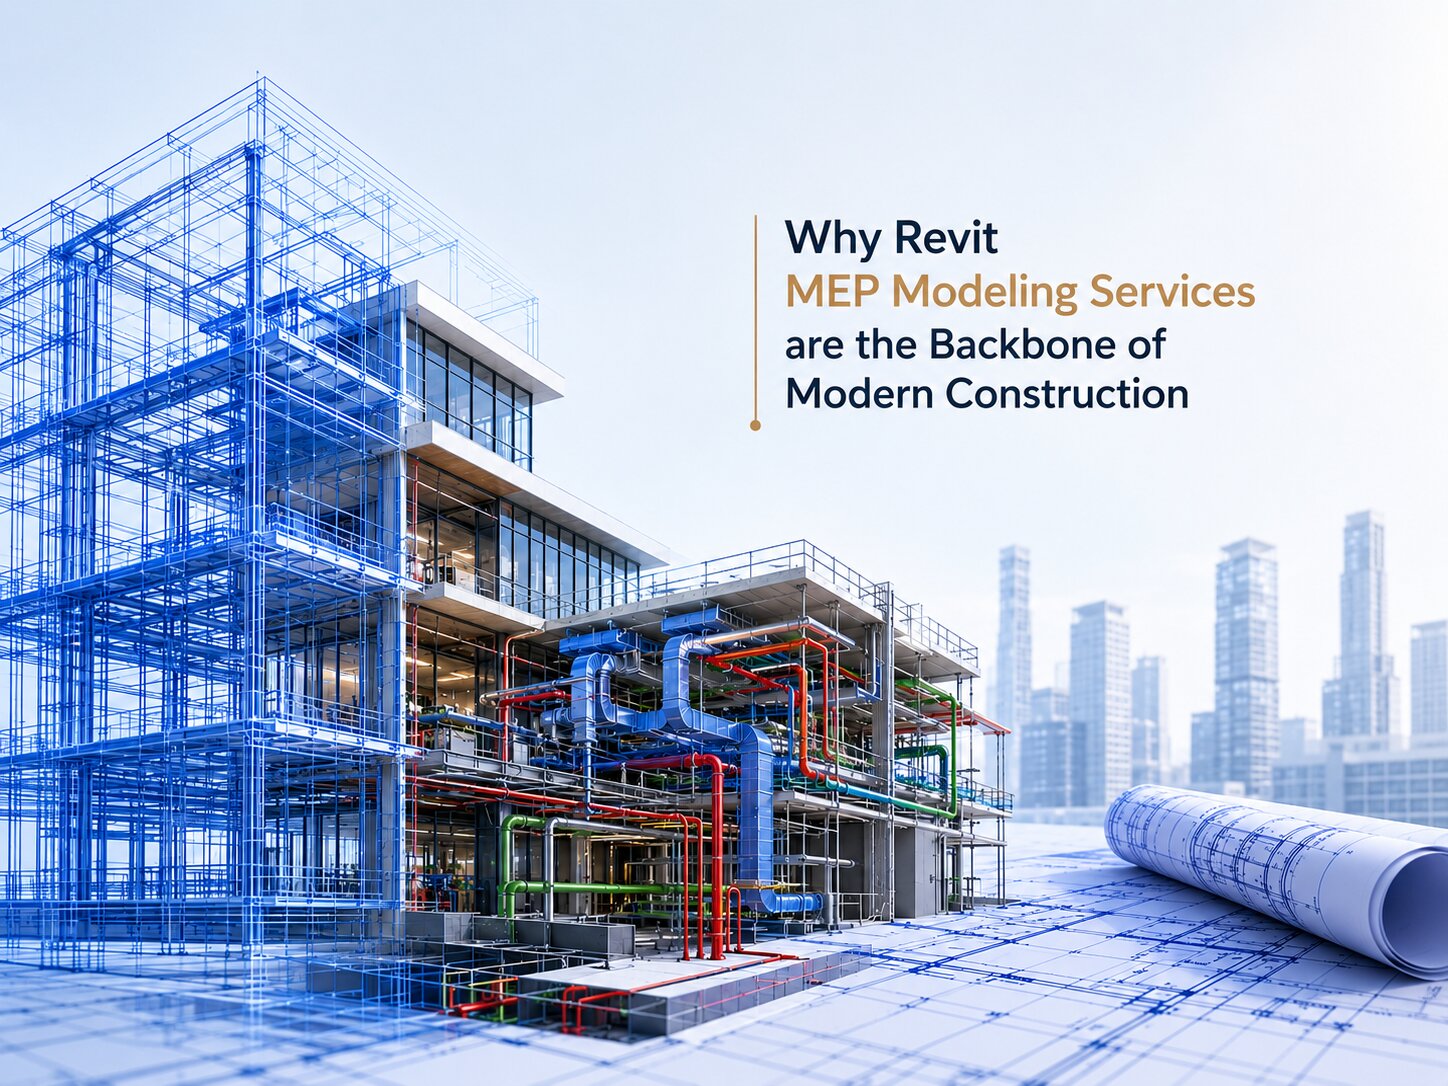
Today, modern construction doesn’t leave things to chance. With complex sustainable designs and tight spatial tolerances, Revit MEP modeling services have transitioned from a “nice-to-have digital twin” to an absolute necessity. Building Information Modeling (BIM) for MEP systems allows engineers, architects, and contractors to build, test, and troubleshoot a structure virtually before a single shovel hits the dirt.

Here is an in-depth look at why MEP BIM services are rewriting the rules of successful construction delivery.

What Are Revit MEP Modeling Services?

MEP stands for Mechanical, Electrical, and Plumbing — the three core building systems that determine whether a structure is functional, safe, and livable. Revit MEP Modeling Services refer to the process of designing, coordinating, and documenting these systems digitally in 3D using Autodesk Revit software.

But here’s the thing — it’s not just about 3D drawing. Revit creates what’s called a BIM an intelligent, data-rich model where every pipe, duct, conduit, and fitting carries real-world data like dimensions, material specs, load requirements, and cost estimates.

When you bring MEP Coordination in Construction into this BIM environment, you’re no longer working with flat drawings that teams interpret differently. You’re working in a shared, live BIM model of the building — before a single shovel hits the ground.

What Does a Revit MEP Model Actually Include?

A complete Revit MEP model typically covers:

  • Mechanical systems — HVAC systems, ductwork, air handling units, chillers, cooling towers
  • Electrical systems — Power distribution, lighting layouts, cable trays, conduit routing, switchgear
  • Plumbing systems — Domestic water supply, drainage, sanitary systems, hot water systems
  • Fire Protection systems — Sprinkler networks, fire suppression layouts (often included as MEP-FP)

All of these systems are modeled in the same environment, which means every team — mechanical, electrical, plumbing, structural, architectural — can see exactly how everything fits together.

The Real Importance of MEP BIM in Today's Construction Industry

Why are general contractors and developers demanding BIM workflows early in the design phase? The answer boils down to predictability, risk mitigation, and the bottom line.

1. Eliminating Field Friction with MEP Coordination in Construction

One of the most critical phases of pre-construction is MEP coordination in construction. When individual trades design their systems in isolation, a major HVAC duct will inevitably slice right through a structural steel beam or a plumbing line.

By utilizing Revit, all trades collaborate within a federated model. Advanced clash detection tools catch these spatial conflicts digitally. Resolving a clash on a computer screen costs a few clicks; resolving it on a construction site requires jackhammers, re-ordering materials, and weeks of delay.

2. Boosting Material Accuracy and Prefabrication

Revit MEP models can be developed to a high Level of Development (LOD 400), meaning the digital components precisely mimic the real-world fabrications. This allows contractors to prefabricate complex duct assemblies and plumbing spools offsite in a controlled factory environment. Prefabrication accelerates the project timeline, reduces on-site waste, and significantly improves safety

3. Streamlining Lifecycle Management and Facility Operations

The value of a Revit MEP model doesn’t expire when construction ends. The data-rich “As-Built” model is handed over to facility managers. If a valve leaks ten years from now, the maintenance team doesn’t have to tear down drywall blindly. They can look at the BIM model to find the exact model number, installation date, and shut-off location.

Key Benefits of Revit MEP Modeling Services for Modern Construction Projects

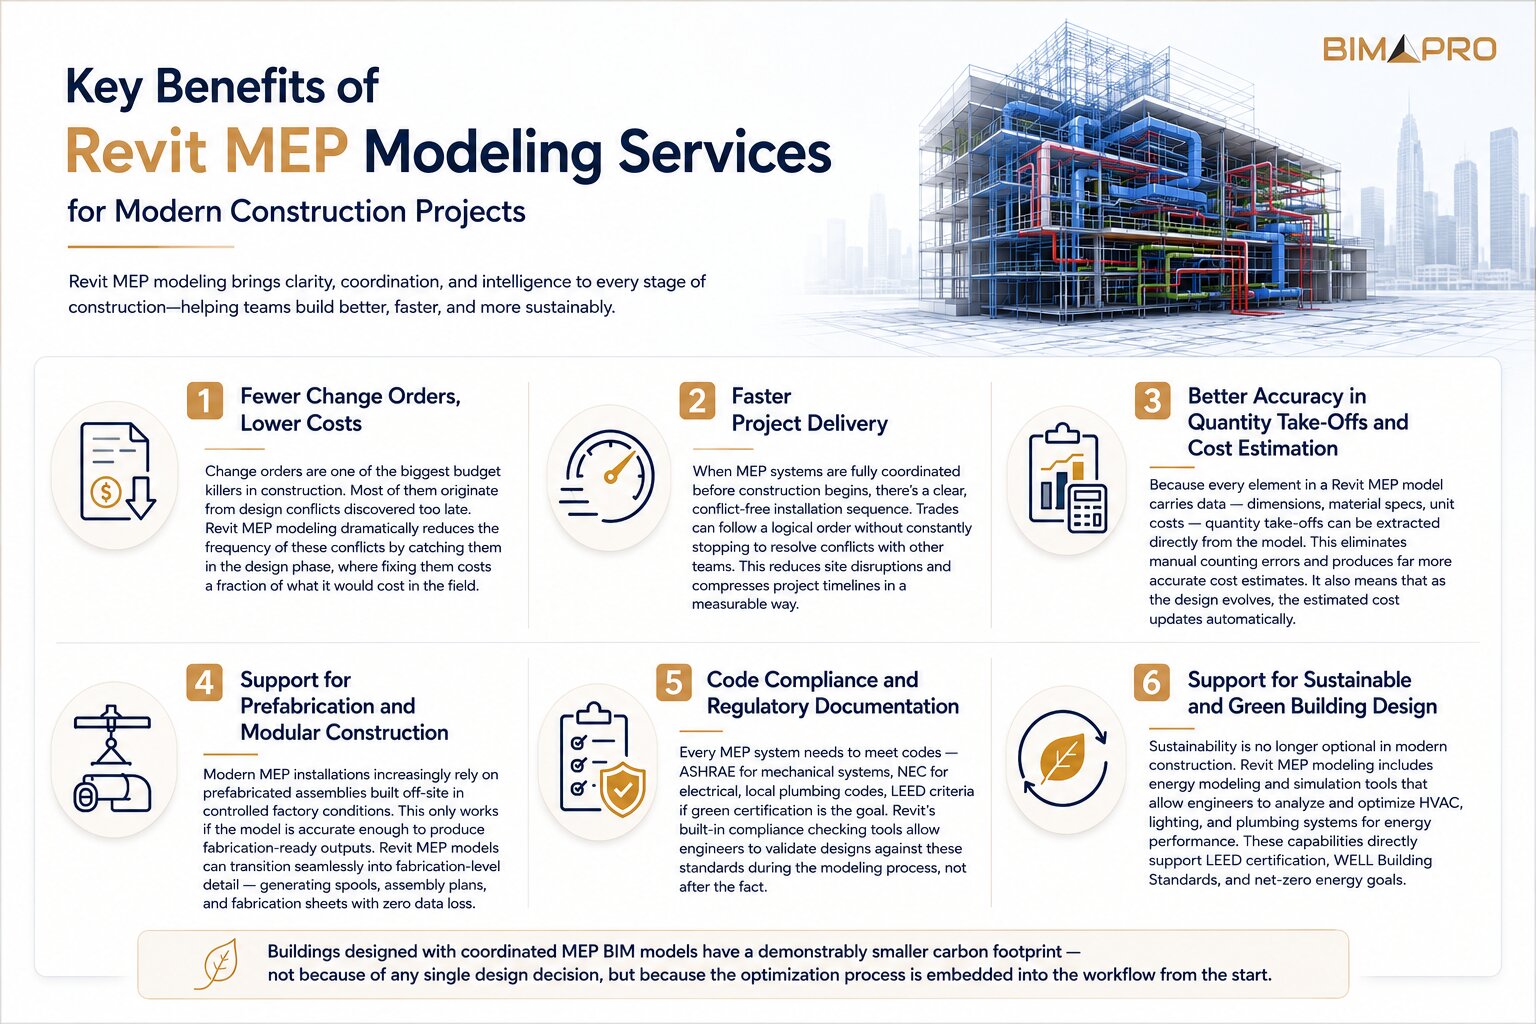
1. Fewer Change Orders, Lower Costs

Change orders are one of the biggest budget killers in construction. Most of them originate from design conflicts discovered too late. Revit MEP modeling dramatically reduces the frequency of these conflicts by catching them in the design phase, where fixing them costs a fraction of what it would cost in the field.

2. Faster Project Delivery

When MEP systems are fully coordinated before construction begins, there’s a clear, conflict-free installation sequence. Trades can follow a logical order without constantly stopping to resolve conflicts with other teams. This reduces site disruptions and compresses project timelines in a measurable way.

3. Better Accuracy in Quantity Take-Offs and Cost Estimation

Because every element in a Revit MEP model carries data — dimensions, material specs, unit costs — quantity take-offs can be extracted directly from the model. This eliminates manual counting errors and produces far more accurate cost estimates. It also means that as the design evolves, the estimated cost updates automatically.

4. Support for Prefabrication and Modular Construction

Modern MEP installations increasingly rely on prefabricated assemblies built off-site in controlled factory conditions. This only works if the model is accurate enough to produce fabrication-ready outputs. Revit MEP models can transition seamlessly into fabrication-level detail — generating spools, assembly plans, and fabrication sheets with zero data loss.

5. Code Compliance and Regulatory Documentation

Every MEP system needs to meet codes — ASHRAE for mechanical systems, NEC for electrical, local plumbing codes, LEED criteria if green certification is the goal. Revit’s built-in compliance checking tools allow engineers to validate designs against these standards during the modeling process, not after the fact.

6. Support for Sustainable and Green Building Design

Sustainability is no longer optional in modern construction. Revit MEP modeling includes energy modeling and simulation tools that allow engineers to analyze and optimize HVAC, lighting, and plumbing systems for energy performance. These capabilities directly support LEED certification, WELL Building Standards, and net-zero energy goals.

Buildings designed with coordinated MEP BIM models have a demonstrably smaller carbon footprint — not because of any single design decision, but because the optimization process is embedded into the workflow from the start.

Key Benefits of Revit MEP Modeling Services for Modern Construction Projects

Frequently Asked Questions (FAQs) About Revit MEP Modeling Services

1: What exactly is Revit MEP Modeling and how is it different from regular CAD drafting?

Traditional CAD drafting produces flat, 2D drawings that represent what systems look like on paper. Revit MEP Modeling creates an intelligent 3D model where every component carries real data — dimensions, material specs, performance parameters, and cost. This means the model can be analyzed, coordinated across disciplines, used for quantity take-offs, and updated automatically when changes are made. CAD tells you what something looks like. Revit MEP tells you what it is and how it connects to everything else.

2: How does MEP BIM reduce construction costs in practice?

The primary cost savings come from three areas: (1) Clash detection eliminates expensive rework that happens when systems conflict on site. (2) Accurate, model-based quantity take-offs reduce estimation errors and waste. (3) A coordinated installation sequence reduces idle time and rework between trades. Industry research consistently shows that every dollar invested in BIM coordination returns multiple dollars in saved rework and change order costs.

3: Is Revit MEP Modeling only suitable for large construction projects?

No. While the ROI is most dramatic on large, complex projects like hospitals, data centers, and high-rise buildings, Revit MEP Modeling Services are now routinely used on mid-scale commercial and multi-family residential projects. The key factor isn’t project size — it’s the density and complexity of MEP systems relative to available space and the number of coordinating trades involved.

4: What is the difference between MEP design and MEP coordination?

MEP design refers to the engineering work of specifying and sizing systems — determining duct sizes, calculating electrical loads, selecting equipment. MEP coordination refers to the spatial coordination of all those designed systems with each other and with the building’s structure and architecture. Revit MEP Modeling Services support both activities, but MEP Coordination in Construction is where the BIM environment provides its most visible value: ensuring everything physically fits together without conflicts.

5: Can Revit MEP models be used after construction is complete?

Absolutely — and this is one of the most underutilized aspects of BIM MEP investment. As-built Revit MEP models serve as the foundation for facility management: locating system components, planning maintenance, managing renovations, and integrating with building automation systems. In smart building environments, MEP models are increasingly connected to live IoT sensor data, creating a dynamic digital twin of the building’s operating systems.

6: How does Revit MEP Modeling support green building certification like LEED?

Revit MEP includes built-in energy modeling and simulation tools that allow engineers to optimize HVAC, lighting, and plumbing systems for energy efficiency during the design phase. This supports documentation requirements for LEED certification and other sustainability standards. By integrating rainwater harvesting design, efficient fixture selection, solar studies, and energy load simulations directly into the MEP model, teams can target green building goals from the earliest stages of design — rather than retrofitting sustainability at the end.

Conclusion: In Modern Construction, Revit MEP Modeling Isn't Optional Anymore

Revit MEP Modeling Services give construction teams the intelligence, coordination, and confidence they need to deliver these buildings right the first time. From eliminating costly clashes before construction begins, to enabling prefabrication, supporting green certification, and creating digital assets that serve buildings for decades — the importance of MEP BIM extends across every phase of a project’s lifecycle.

The teams and organizations that embrace BIM MEP Systems Design today aren’t just staying competitive — they’re setting the benchmark for the future of construction.

At BIMPRO LLC, we understand that successful projects are built on precision, coordination, and forward-thinking technology. Our expertise in Revit MEP BIM Services helps clients streamline workflows, reduce risks, and deliver high-performance buildings with confidence. By combining technical excellence with practical industry insight, BIMPRO partners with you to turn complex designs into coordinated, constructible, and future-ready solutions.

Revit vs AutoCAD: Which Tool Is Right for Your AEC Project in 2026

Revit vs AutoCAD: Which Tool Is Right for Your AEC Project in 2026

Revit vs AutoCAD: Which Tool Is Right for Your AEC Project in 2026

Picking the right software for your construction, engineering, or design project can feel a bit overwhelming. But when you look closely at Revit vs AutoCAD, the choice becomes much simpler once you understand how each tool actually works.

For decades, the central debate for project managers, design directors, and tech leads has centered around two industry titans from Autodesk. Even now, choosing between Revit vs AutoCAD remains a foundational decision for any new venture. While both tools are market-leading design applications, they stem from fundamentally distinct operational philosophies. One serves as a highly flexible digital drafting canvas, while the other functions as an intelligent database that models real-world physics and construction data. Understanding how these tools match up against current industry demands will help ensure your team stays efficient and competitive.

What is AutoCAD?

Launched in the early 1980s, AutoCAD revolutionized design by replacing traditional drafting boards with digital screens. At its core, AutoCAD is a Computer-Aided Design tool that leverages vector-based geometry. Designers use lines, arcs, circles, and polylines to represent real-world objects in a digital workspace.

Because AutoCAD doesn’t automatically attach deep physical properties to these shapes, a line can represent the edge of a concrete foundation wall, an electrical conduit, or a custom furniture outline, depending on the layer it occupies. This geometric flexibility makes it an exceptionally versatile canvas for various disciplines. Over the years, understanding the fundamental AutoCAD and Revit Difference has helped firms realize that AutoCAD excels at precision drafting, schematic detailing, and producing highly customized 2D documentation across countless industries beyond construction, such as manufacturing, aerospace, and electrical engineering.

What is Revit?

Revit was built from the ground up specifically for the AEC sector, operating as a dedicated Building Information Modeling (BIM) platform. Instead of drawing abstract lines to imply architectural features, Revit users build an intelligent, data-driven virtual model using parametric components like actual walls, doors, windows, and structural slabs.

The primary Difference between Revit and AutoCAD lies in this relationship with data. Every component in Revit contains embedded parametric information, such as physical dimensions, structural material properties, thermal values, cost metrics, and manufacturer data. When you place a window in a Revit model, the software dynamically cuts an opening in the wall and tracks that asset globally. If you modify the window’s dimensions in a 3D view, the corresponding 2D floor plans, elevations, sections, and material schedules update automatically across the entire project file, eliminating the need to update individual drawings manually.

Revit vs AutoCAD: Core Difference at a Glance

To fully grasp how these workflows diverge, we can break down their operations across ten critical design parameters.

  • Software Type: AutoCAD functions primarily as a universal 2D and 3D computer-aided drafting program that mimics traditional paper drawing. Revit is an integrated, multidisciplinary Building Information Modeling (BIM) engine that simulates a real building environment.
  • Design Approach: AutoCAD relies on generating separate geometric drawings (plans, sections, elevations) manually. Revit utilizes an object-oriented parametric approach where you construct a singular, central digital building asset from which all views are automatically derived.
  • Primary Output: The primary deliverables in AutoCAD are independent .dwg drawing sheets that must be managed individually. Revit generates an integrated, information-rich 3D database model from which all coordinated sheets, visual renderings, and material lists are extracted.
  • Data Intelligence: AutoCAD shapes carry minimal metadata out of the box, functioning mostly as graphical symbols. Revit components carry deep parametric metadata, directly linking geometry to real-world specifications, structural loads, and engineering calculations.
  • Documentation: In AutoCAD, if a wall shifts, you must manually track and edit that change on every floor plan, elevation, and structural detail sheet. Revit handles documentation dynamically; modifying an object updates every view and schedule instantly, drastically reducing human error.
  • Coordination: AutoCAD requires cross-referencing external references (Xrefs) manually across different discipline files, which can lead to communication gaps. Revit supports a shared, centralized workspace environment where architects, structural engineers, and MEP specialists can collaborate simultaneously on a single cloud-hosted model.
  • Clash Detection: Identifying systemic structural spatial conflicts in AutoCAD requires visual checks across overlapping 2D layers, which is highly prone to oversight. Revit features automated, algorithmic clash detection that flags spatial interference between systems before construction begins on-site.
  • Best for: AutoCAD is excellent for rapid 2D schematic design, specialized component fabrication drafting, and standardized detail libraries. Revit is the industry standard for comprehensive, lifecycle-managed commercial and residential building design, coordination, and facility operations.
  • 3D Capability: When evaluating AutoCAD 3D vs Revit, AutoCAD 3D treats elements as surface or solid meshes built via manual geometric operations. Revit handles 3D natively as an automatic byproduct of its parametric architectural components—when you draw a wall in 2D, it is already a 3D object.
  • Pricing: Both software packages are delivered via Autodesk subscription models. AutoCAD buy is available standalone or within specialized toolsets, whereas Revit buy sits at a higher price tier reflecting its data-rich BIM architecture and advanced coordination tools.
Revit vs AutoCAD DIfferences

AutoCAD vs Revit for Architects and Interior Designers: Which one should you use in 2026

When choosing a platform for creative architectural design, the choice often depends on your project delivery requirements and delivery scale. Weighing AutoCAD architecture vs Revit reveals that while AutoCAD’s architectural toolset provides helpful automated routines for drawing 2D walls and doors, it still cannot compete with the holistic data environments that modern building owners demand. For general project delivery in 2026, most architecture firms lean heavily on Revit to keep pace with industry BIM requirements, coordinate with engineering consultants, and provide clients with immersive, data-rich assets.

For interior design teams, spatial agility is everything. When exploring AutoCAD vs Revit for Interior Design, AutoCAD remains a strong contender for boutique studios that focus heavily on custom furniture detailing, bespoke millwork fabrication drawings, and quick tenant fit-outs. AutoCAD allows designers to iterate freely without setting up complex structural parameters first. However, for interior designers working on large-scale commercial, hospitality, or healthcare projects, Revit is often indispensable. It allows teams to track FF&E (Furniture, Fixtures, and Equipment) schedules in real-time, generate automated room finish matrices, and coordinate spatial clearances directly with MEP engineers to ensure no light fixtures or air vents conflict with the interior aesthetic.

When to use Revit?

Revit is the ideal choice for projects where long-term collaboration, construction accuracy, and lifecycle data are paramount. If you are developing mid-to-large-scale commercial developments, institutional structures, or complex residential complexes, Revit is practically non-negotiable. It allows large, multi-disciplinary teams to work together in a single file without stepping on each other’s toes, maintaining a “single source of truth” throughout the design process.

Firms that leverage comprehensive Revit bim services can coordinate complex structural framing and HVAC duct routing well before construction crews arrive on-site, minimizing costly field modifications and material waste. Furthermore, if your project involves upgrading or retrofitting an existing historical building, modern scanning technologies make it easy to transition into a BIM environment. For example, specialized workflows like Point cloud to Revit modeling Texas allow local engineering teams to take raw laser scans of existing facilities and convert them directly into precise, parametric Revit elements, dramatically reducing field-verification errors and giving designers an incredibly accurate digital twin to work from.

When to go with AutoCAD?

Despite the global shift toward BIM, AutoCAD continues to hold a vital position in the modern AEC ecosystem. AutoCAD is highly effective for standalone consultants, specialized fabricators, and civil engineers focused on infrastructure layouts. It requires significantly less computational overhead and training time compared to Revit, making it highly accessible.

If your team’s primary deliverables consist of independent 2D schematic layouts, civil site plans, electrical line diagrams, or detailed manufacturing drawings, AutoCAD provides a fast, light, and streamlined workspace. It allows you to get ideas down quickly without worrying about complex element relationships. This makes it an efficient, cost-effective option for smaller firms handling residential renovations, landscape architecture, or minor commercial tenant improvements that do not require complex structural coordination or automated material quantities.

Can you use both Revit and AutoCAD together?

It is common practice for successful AEC firms to use both tools collaboratively rather than treating them as mutually exclusive options. AutoCAD and Revit can form a highly integrated hybrid workflow that plays to the unique strengths of each program, creating a more balanced and flexible design pipeline.

Many teams use AutoCAD during the initial schematic design phase for quick, loose spatial brainstorming, site planning, and conceptual detailing. These 2D .dwg files can then be linked directly into Revit as underlays to build out the high-fidelity parametric BIM model. Additionally, detailed engineering sections and standard component drawings that your firm has perfected over decades in AutoCAD can easily be imported into Revit detail views, preserving your established drafting standards while keeping you firmly within a modern, collaborative BIM ecosystem.

FAQs

1. Is Revit Better Than AutoCAD?

Neither program is universally “better,” as they serve fundamentally different purposes. Revit is superior for comprehensive, multi-disciplinary building information modeling, automated scheduling, and lifecycle tracking. AutoCAD is superior for generalized 2D vector drafting, rapid line-work iteration, and cross-industry geometric design.

2. What is the Main Difference Between Revit and AutoCAD?

The main Difference between Revit and AutoCAD is that AutoCAD is a vector drafting tool used to create independent 2D drawings out of lines and geometric shapes, while Revit is a parametric BIM platform used to build an intelligent, data-integrated 3D database model where all views remain dynamically linked.

3. Is AutoCAD 3D the Same as Revit?

No. When comparing AutoCAD 3D vs Revit, AutoCAD 3D focuses on creating geometric shapes using manual solid or surface modeling techniques without intrinsic architectural metadata. Revit models are inherently 3D because they are built using intelligent parametric architectural components that carry metadata, structural properties, and behavioral rules.

4. Which is Better for Interior Design, AutoCAD or Revit?

When evaluating AutoCAD vs Revit for Interior Design, AutoCAD is often preferred for custom furniture details and quick, drafting-focused projects. Revit is much better for large commercial interiors where tracking complex finish schedules, managing extensive material quantities, and coordinating with MEP systems are critical to project success.

5. Should Architects Use AutoCAD or Revit in 2026?

Architects should generally prioritize Revit to remain competitive with modern project requirements. Most commercial clients, municipal agencies, and general contractors expect coordinated BIM models for clash detection and facilities management. However, keeping AutoCAD available for quick site plans and legacy detail reference remains highly useful.

Conclusion

Ultimately, choosing between Revit vs AutoCAD comes down to the scale of your projects, your specific deliverables, and your client expectations. If your goal is to deliver data-driven, highly coordinated buildings with minimized field errors and automated scheduling, investing in Revit is the clear path forward. If your focus centers on versatile 2D drafting, specialized fabrication detailing, or civil layouts, AutoCAD remains an unmatched industry standard. By understanding the unique strengths of each tool, your firm can build a highly effective tech stack tailored to your exact design goals.

Navigating this software transition or managing hybrid project demands doesn’t have to strain your internal team. Partnering with a leading BIM company in the USA like BIMPRO LLC allows you to seamlessly bridge the gap. Whether you need high-fidelity Revit modeling, sharp AutoCAD documentation, or professional BIM coordination services, BIMPRO LLC delivers the technical expertise required to bring your AEC projects to life with absolute precision in 2026.

How BIM Is Transforming Data Center Design and Construction

How BIM Is Transforming Data Center Design and Construction

How BIM Is Transforming Data Center Design and Construction - BIMPRO LLC

Data centers today are among the most demanding and technically complex projects in the construction world. These buildings run the digital infrastructure of modern businesses, storing everything from banking systems to cloud data, AI workloads, and sensitive information. Because of this, even the smallest design or construction error can lead to performance issues, high energy consumption, or costly downtime. This is exactly why Building Information Modeling (BIM) has become an essential part of how data centers are planned, designed, coordinated, and delivered across the USA.
BIM brings every system—architecture, structure, electrical, HVAC, fire protection, cabling, and IT equipment—into one intelligent 3D environment. It allows teams to see the entire facility before it is built, understand complex routing, avoid clashes, plan for redundancy, and deliver projects with far greater speed and confidence. In this blog, let’s explore how BIM is transforming modern data center design and construction.

Understanding the Complexity of Modern Data Centers

Designing a data center is not the same as designing a normal commercial building. These facilities need to handle heavy electrical loads, advanced cooling systems, thousands of feet of cabling, and multiple layers of redundancy to support 24/7 uptime. Power systems must be backed up by UPS units and generators, cooling systems must be perfectly balanced to avoid hot spots, and all equipment must comply with Tier III or Tier IV standards.
With so many interdependent systems packed into tight spaces, traditional 2D drawings are simply not enough. They often fail to capture conflicts between systems, leading to rework, delays, and cost overruns. BIM solves this problem by giving every stakeholder a clear, coordinated, and fully detailed digital model of the entire data center before construction begins.

How BIM Improves Data Center Design and Coordination

  1. Better Visual Understanding Through 3D Models

One of the biggest advantages of BIM is the ability to visualize the entire data center in 3D before construction begins. This is especially crucial for data centers where mechanical room are dense, cable trays and conduits overlap, colling and airflows pathways need precise routing. Project team can rotate, inspect, and coordinate systems clearly and reducing errors that typically happen in 2D plans.

2. Clash Detection Saves Time and Cost

Data centers are MEP-heavy projects. Even a small clash between ducts and cable trays, electrical conduits and chilled water pipes, fire suppression and ventilation systems can cause major delays during installation. BIM tools like Revit, Navisworks, or ACC Coordinate automatically detect these clashes early in the design stage. This helps teams avoid rework, reduce onsite change orders, speed up construction schedules, and maintain clean routing.

3. BIM Helps Maintain Redundancy and Reliability

Data centers are MEP-heavy projects. Even a small clash between ducts and cable trays, electrical conduits and chilled water pipes, fire suppression and ventilation systems can cause major delays during installation. BIM tools like Revit, Navisworks, or ACC Coordinate automatically detect these clashes early in the design stage. This helps teams avoid rework, reduce onsite change orders, speed up construction schedules, and maintain clean routing.

4. Improved Cooling and Airflow Management

Cooling systems are the hear of any data center. Even the smallest inefficiency increases power usage and decrease equipment life. Using BIM, you can visualize hot aisle/cold aisle layouts, model CRAH/CRAC units, plan airflow distribution, identify heat pockets, improve overall energy efficiency. This leads to a better PUE (Power Usage Effectiveness) and reduced operational costs.

5. Faster Prefabrication and Modular Construction

Data centers today are being delivered faster than ever. Many owners are adopting prefabricated electrical skids, modular data center pods, and premanufactured mechanical racks. BIM plays a huge role in prefabricating by ensuring exact dimensions, accurate tolerances, smooth installation, and fewer field errors. This reduces labor costs, material waste, and construction time.

6. Effective Collaboration Across All Teams

BIM creates a shared platform where architects, engineers, general contractors, MEP contractors, and owners can all communicate in real time. Teams can work on a common 3D model, share updates instantly, track version history, maintain transparency, and ensure aligned project goals.

7. Digital Twins for Data Center Operations

After construction, data centers need continuous monitoring for equipment health, cooling performance, power usage, fire system readiness. A BIM based digital twin acts as a live replica of the facility. It helps facility management teams to track assets, plan maintenance, predict failures, improve efficiency, reduce downtime.

Conclusion: BIM is the Future of Data Center Construction

BIM is no longer just a design tool—it is a complete digital process that transforms how data centers are planned, coordinated, built, and maintained. From clash-free MEP coordination to improved cooling performance, and from prefabrication to digital twins, BIM ensures that data centers meet the highest standards of reliability and efficiency. As the USA continues to see rapid growth in digital infrastructure, BIM will remain at the center of every successful data center project. Contact BIMPRO LLC today and let us help you build a smarter and more efficient data center.

What Is Point Cloud to BIM and How Does It Reduce Project Risks?

What Is Point Cloud to BIM and How Does It Reduce Project Risks?

What is Point Cloud to BIM and How is it Used to Reduce Risks

In today’s construction and architecture projects, accuracy is very important. Even small measurement mistakes can cause design conflicts, budget issues, and project delays. Point Cloud to BIM helps solve this problem by using real site data to create accurate digital models. When combined with Scan to BIM Services, it gives project teams a clear and reliable view of existing site conditions before design or construction begins.

This article explains what Point Cloud to BIM is, how it works, and how it helps reduce risks in AEC projects.

What Is Point Cloud to BIM?

Point Cloud to BIM is a process where data collected from 3D laser scanners or LiDAR devices is converted into a detailed Building Information Model. A point cloud is made up of millions of small data points that show the exact shape and size of buildings, structures, and spaces using X, Y, and Z coordinates.

This point cloud data is imported into BIM software like Autodesk Revit and turned into an intelligent 3D model. The model represents the actual site conditions and can be used for design, renovation, construction planning, and facility management.

How Is Point Cloud Data Captured?

The process begins with 3D laser scanning or LiDAR surveying. These advanced scanning tools capture high-accuracy spatial data by emitting laser beams that bounce back from surfaces. Each reflection is recorded as a data point, and millions of these points create a comprehensive 3D cloud.

Why Is Point Cloud to BIM Important for the AEC Industry?

Many construction projects face issues due to outdated drawings, missing information, or incorrect site measurements. Traditional surveying methods often fail to capture complex details. Point Cloud to BIM provides a clear digital record of existing conditions and removes guesswork.

Benefits for Different Teams

    • Architects can design accurately using real site conditions.
    • Engineers can study structural and MEP systems without repeated site visits.
    • Contractors can identify issues early and avoid on-site changes.
    • Owners and Facility Managers get accurate digital records for future use.

How Point Cloud to BIM Helps Reduce Project Risks

1. Reduces Measurement Errors

Laser scanning captures very accurate data and removes the risk of human measurement mistakes.

2. Detects Design Clashes Early

BIM models created from point clouds help identify clashes between structural, mechanical, and electrical systems before construction starts.

3. Improves Planning and Cost Control

Accurate models help teams plan better, estimate quantities correctly, and reduce unexpected change orders.

4. Supports Safer Renovation Projects

Digital site data reduces the need for repeated physical site visits, which improves safety and saves time.

5. Creates Reliable As-Built Models

Point cloud to BIM conversion provides accurate as-built BIM models that can be used for future renovations and facility management.

Software and Tools Used for Point Cloud to BIM

3D Scanning Tools

Leica, Faro, Trimble, NavVis, Matterport

Point Cloud Processing Software

Autodesk ReCap, Bentley ContextCapture, CloudCompare

BIM Modeling Software

Autodesk Revit, Navisworks, ArchiCAD, Vectorworks

Conclusion

Point Cloud to BIM is an innovative and reliable way to capture real building conditions and convert them into accurate BIM models. It helps reduce errors, avoid rework, improve safety, and control project costs.

At BIMPRO LLC, a leading BIM company in the USA, we provide high-quality Point Cloud to BIM services for renovation, retrofit, and construction projects. Our experienced team delivers accurate and detailed BIM models that support confident decision-making throughout the project lifecycle.

Ready to Start Your Point Cloud to BIM Project?

Contact BIMPRO LLC today to discuss your project requirements and get accurate BIM models you can trust.

Request a free consultation or ask for a sample model.

You can reach out to us at +1 (346) 508-6588 or via email at info@bimprous.com.

Revit Drafting: The Complete Guide to 2D Detailing in a BIM World

Revit Drafting: The Complete Guide to 2D Detailing in a BIM World

Revit Drafting-Complete Guide to 2D Detailing | BIMPRO USA

When we think of Revit, the first thing that usually comes to mind is 3D modeling — smart walls, floors, roofs, and intelligent building components. But behind every beautiful model lies a foundation of 2D drawings and details that bring the design to life on-site. That’s where Revit Drafting comes in — a critical but often overlooked aspect of BIM.

In this guide, we’ll explore everything you need to know about Revit drafting — from the basics to best practices — and how it fits into your workflow whether you’re an architect, designer, or construction professional.

What is Revit Drafting?

So, you’ve probably heard that Revit is used to create 3D models of buildings. You can model everything — walls, floors, roofs, windows — pretty much the whole structure. It’s like building a virtual version of your project on the computer.

But here’s the thing: even after the 3D model is done, you still need to explain how to actually build it in real life. You can’t just send a contractor a 3D file and say, “Here you go, build this.” That’s not how it works. Builders need proper construction drawings — like floor plans, sections, and detailed views that clearly show how different parts come together.

This is where Revit Drafting Services comes into play.

Think of it like the old-school hand-drawing architects used to do, but now it’s done digitally inside Revit. You use drafting tools in Revit to create neat and accurate 2D drawings — especially the little details, like how a window fits into a wall or how a roof edge is waterproofed. It’s quick, smart, and much cleaner than drawing by hand. And it helps make sure everyone on site knows exactly what to do.

Two Ways You Can Do Drafting in Revit

When you’re working in Revit, there are two main ways to do drafting, and each one has its own purpose depending on what you’re trying to show.

  1. Drafting That’s Connected to Your Model

This first type of drafting comes straight from your 3D model. As you build your model — walls, doors, floors, roofs — Revit automatically creates views like floor plans, sections, and elevations based on what you’ve modeled.

For example, if you draw a wall in 3D, Revit will automatically show that wall in the floor plan. And here’s the cool part: if you change something — like make the wall taller or switch its material — Revit updates all the related views automatically. No need to redraw anything.

These views are smart and stay in sync with your model. So, when the model changes, your drawings change too. It saves a lot of time and keeps things accurate. These are called “live views“, and they’re great for showing real-time progress and construction info directly tied to your design.

  1. Drafting Views (Like Sketching from Scratch)

The second way is called a drafting view, and it’s more like sketching on a blank sheet of paper. These views aren’t connected to the model. They’re just clean, empty 2D spaces where you can draw details from scratch.

Let’s say you need to show a typical wall section that you use on every project, or a flashing detail around a window — something you already know and don’t need to model every time. In that case, you just open a drafting view and start drawing using lines, hatch patterns, text notes, and detail components.

It’s like you’re freehand drawing a familiar detail — but doing it digitally, in a way you can reuse again and again across different projects.

Tools You’ll Use for Drafting in Revit

When it comes to drafting in Revit, there are some really handy tools that make your work easier and your drawings look clean and professional. Let’s go through them one by one :

  • Detail Lines – These are your go-to lines for drawing things manually. You can use them to sketch edges, outlines, shapes — basically anything you want to show in 2D that isn’t coming directly from the model. It’s kind of like using a pencil to draw something on paper, but now it’s all digital.
  • Filled Regions – Imagine you’re shading in part of your drawing to show different materials — like concrete, insulation, or soil. That’s what filled regions are for. You can apply different hatch patterns to areas, making your details easy to understand at a glance. It’s like coloring inside the lines with patterns instead of colors.
  • Detail Components – These are ready-made 2D parts that you can just drop into your drafting views. Think of things like steel bolts, wall ties, anchors, or insulation batts. Instead of drawing each tiny piece from scratch every time, you just pick one from the library and place it in your view. Saves time and keeps things looking neat and consistent.
  • Text Notes & Leaders – Need to explain something on your drawing? You’ll use text notes. Add simple labels like “Install flashing here” or “Provide waterproofing.” You can also attach leaders — those little arrows or lines that point from your note to the exact spot you’re talking about. It makes your details clear and easy to follow.
  • Dimensions – To show how far things are from one another, you’ll use dimensions. The best part? They’re smart — if you move something, the dimension updates automatically. No more re-checking measurements or redrawing when things shift.
  • Keynotes – These are like smart labels. Instead of typing out full notes every time, you can use keynotes to tag elements with pre-written descriptions — like “Wall Type B” or “Steel Beam W10x30.” It helps keep your notes short, standardized, and consistent across the whole drawing set.

Why Use Revit for Drafting?

You might be wondering, “Why not just use AutoCAD or even hand-draw the details on paper?” Well, here’s why Revit is such a game-changer when it comes to drafting:

  • Everything Updates Automatically

One of the coolest things about Revit is that everything is connected. So, if you make a change to the 3D model — like adjusting the thickness of a wall — all the related views update automatically. For example, if you’ve already created a wall section and later decide to change the wall thickness in your model, Revit does the work for you and updates the section view accordingly. No need to manually redraw everything, which saves a ton of time.

  • Revit Is Smart

Revit isn’t just a dumb drawing tool. It’s smart! Tags and dimensions in Revit pull live data directly from the model. This means that the information you add to your drawings — like wall types, material details, or dimensions — always stay accurate. Plus, it reduces the need for constant typing, and you’ll have fewer chances of making mistakes.

  • It Saves You Time

Drafting in Revit is a lot faster than drawing everything from scratch. Once you create a standard detail or view, you can reuse it in multiple projects. That means you don’t have to redraw the same wall section or door detail over and over again. Revit lets you save those details as templates or reusable views, making your workflow much more efficient.

  • It Keeps Your Drawings Consistent

Revit helps you keep your entire set of drawings consistent. Whether it’s line weights, text styles, or hatch patterns, everything can follow a set of rules called view templates. This ensures that your drawings look professional and polished every time, without worrying about inconsistencies that can happen when you’re working in other software or by hand.

Are you seeking professional assitance on Revit drafting Services

Reach out to BIMPRO experts team at info@bimprous.com or Contact us!

Real-Life Example

Imagine you’re designing a small office building. You’ve already modeled the entire building in 3D — walls, doors, roofs, windows, all the major elements. It’s looking great, but then the contractor asks, “Can you show me exactly how the roof overhang connects to the brick wall below?”

Now, instead of scrambling to figure out how to show this detail, you simply go into Revit. You take the elevation view of the building and create a callout, which zooms in on that specific area where the roof meets the wall. Then, you get to work detailing it. You add detail lines to show the exact connection, use filled regions to represent materials like insulation or flashing, and maybe drop in some detail components like the flashing or bolts from Revit’s library.

To make sure everything is clear, you add some text notes with arrows to point out important parts of the connection. Finally, you throw in a few dimensions to show the exact measurements — how far the overhang extends or how thick the wall is.

And just like that, Revit drafting lets you create a precise, professional detail in no time. You’ve gone from a general 3D model to a clear, specific construction drawing without having to redraw anything from scratch. That’s the magic of drafting in Revit — it makes your work quicker, smarter, and more accurate.

Best Tips for Revit Drafting

If you’re working with Revit, there are some tried-and-true tips that can make your drafting process much smoother and more efficient. These are a few little tricks I’ve picked up along the way that really help keep things organized and stress-free.

First off, name your views clearly. It’s such a simple thing but it makes a huge difference. Instead of using default names like “Drafting View 1,” try something more descriptive like “Wall Detail – Typical 2×6 Framing.” This way, when you’re looking through a bunch of views, you’ll know exactly what you’re working with without having to open each one.

Another big time-saver is using view templates. View templates keep all your settings consistent and make sure your drawings look neat and professional. When you apply a template to a view, it automatically adjusts things like line weights, visibility settings, and detail levels. This eliminates the need to manually adjust these settings every time, helping you stay organized and efficient.

Building a detail library is another smart move. If you create a set of standard drafting views for your projects—like common wall sections or typical door details—you can save them in a library for easy access on future jobs. This not only saves time, but it also helps ensure that you’re always working with the same high-quality details, giving your projects a consistent look.

One tip that many people overlook is to not over-model tiny things. For example, you really don’t need to model every little screw or fastener in your project. Sure, it might be tempting to get every detail perfect, but that can slow you down. Instead, draw those small elements in a drafting view or 2D detail. This keeps your model clean and light, while still providing all the necessary information.

Lastly, use real manufacturer details as references whenever you can. Many manufacturers offer detailed drawings for their products, and these can be super helpful for your Revit models. But don’t just drop them in as-is. Take the time to simplify those details to match the level of detail you need for your drawings. This keeps your model easy to navigate and ensures that your drawings aren’t too cluttered.

Revit Drafting for Different AEC Professionals

Revit drafting is used by a wide range of professionals in the building industry, from architects to contractors to engineers. By keeping everything connected in one model, Revit makes the design and construction process smoother, more efficient, and less likely to have errors. Whether you’re designing a building, installing systems, or managing construction, Revit helps everyone stay on the same page and get the job done right.

1. Revit Drafting for Architects

Architects use Revit to create detailed construction documents from the 3D model of the building. These drawings include important details like floor plans, elevations, and sections that show how everything fits together in the building. They can also create detailed views of specific areas, like how a wall meets a roof or a window detail. This way, they can clearly communicate their design to everyone involved in the construction process.

2. Revit Drafting for MEP Engineers (Mechanical, Electrical, Plumbing)

For MEP engineers, Revit is essential in drafting precise drawings for HVAC systems, electrical layouts, and plumbing installations. They can create clear layouts for all these systems within the building, making sure everything fits in the right place and meets building codes. The best part? Revit links these drawings to the 3D model, so if any changes are made in the design, the drawings update automatically.

3. Revit Drafting for Structural Engineers

Structural engineers use Revit to draft detailed plans for the foundation, beams, columns, and other parts of the building’s structure. These detailed views show how different structural elements connect and work together to support the building. With Revit, they can be sure that everything is coordinated with the architect’s and MEP engineer’s designs, making sure the building is safe and stable.

4. Revit Drafting for Civil Engineers

Civil engineers use Revit to draft designs for site work, such as grading, drainage, and site utilities. They create layouts that show how the building’s infrastructure connects to the surrounding environment. Revit helps them visualize how water flows around the building, how utilities are laid out, and how the land is shaped to support the structure.

5. Revit Drafting for Contractors

Contractors rely on Revit drafting to interpret the construction documents, construction drawings and build the project. These detailed drawings give them a clear picture of what needs to be built and how everything fits together. Revit’s live connection to the model means that if any changes are made, the contractor always has the most up-to-date information. This helps avoid mistakes and keeps the project running smoothly.

6. Revit Drafting for Subcontractors

Subcontractors, such as electricians, plumbers, and mechanical workers, also rely on Revit drafting for their part of the work. With clear, accurate drawings, they can easily see where to install electrical outlets, pipes, or ventilation systems. Revit ensures that their work aligns with the rest of the building’s design, reducing confusion and mistakes on the job site.

7. Revit Drafting for Interior Designers

Interior designers also benefit from Revit drafting. They use it to create detailed layouts for the interior spaces of a building, such as where furniture goes or how walls are finished. Revit helps them coordinate with the architects to make sure their designs fit perfectly with the overall building structure and layout.

8. Revit Drafting for Landscape Architects

Landscape architects use Revit to draft plans for outdoor spaces, such as gardens, pathways, and other landscaping elements. They can also work with civil engineers to make sure the site’s drainage and grading are correct, ensuring the landscaping fits seamlessly into the environment around the building.

9. Revit Drafting for Owners and Project Managers

While owners and project managers may not use Revit directly, they still rely on the accurate, detailed drawings it produces. These drawings help them track the progress of the project, manage budgets, and ensure that everything is being built according to the plans.

BIMPRO is a Professional BIM Services Company in USA offering Revit Drafting Services to AEC professional across the Nation.

Conclusion

Revit isn’t just about creating 3D models; it’s also your digital drawing board, where all your design ideas come to life. It combines the best of both worlds, offering a seamless experience that makes your workflow smoother and more efficient. When you use Revit for drafting, you can pull live views directly from your 3D model. These views update automatically as you make changes, so everything stays in sync without any extra effort. You don’t have to worry about manually adjusting every single drawing every time you tweak something—it happens for you.

At the same time, Revit also allows you to create clean 2D sketches that clearly show how things will be built. These drawings are more than just basic sketches—they convey important construction details and provide a clear roadmap for everyone involved in the project. Whether it’s a wall section, a detail, or a floor plan, you can trust that your 2D views will be just as accurate and helpful as the 3D model itself.

Once you get the hang of using both the 3D and 2D features together, you’ll find yourself wondering how you ever worked without Revit. It really does make the process easier and faster, giving you more time to focus on the design itself. So, don’t overlook the 2D side of Revit. Embrace it fully. It’s the secret ingredient that ties everything together, making your project well-documented, easier for builders to follow, and much more complete overall.

Read latest blogs

Why Revit MEP Modeling Services & MEP BIM Are Important in Modern Construction
June 3, 2026
In the past, constructing a building was a game of architectural blueprint supremacy. The structure was drawn, the concrete was poured, and then mechanical, electrical, and plumbing ...
Revit vs AutoCAD: Which Tool Is Right for Your AEC Project in 2026
May 22, 2026
Picking the right software for your construction, engineering, or design project can feel a bit overwhelming. But when you look closely at Revit vs AutoCAD, the choice becomes much s...
How BIM Is Transforming Data Center Design and Construction
November 26, 2025
Data centers today are among the most demanding and technically complex projects in the construction world. These buildings run the digital infrastructure of modern businesses, stori...
What Is Point Cloud to BIM and How Does It Reduce Project Risks?
November 26, 2025
In today’s construction and architecture projects, accuracy is very important. Even small measurement mistakes can cause design conflicts, budget issues, and project delays. Point Cl...
How to Implement BIM in a Small or Medium-Sized Architecture Firms
May 8, 2025
How to Implement BIM in a Small or Medium-Sized Architecture Firms In the ever-changing world of architecture, small and medium-sized firms often find themselves facing the ...
Common Data Environment (CDE) – All You need to Know
May 1, 2025
In any construction project, data is everywhere. From architectural drawings to material schedules, and from clash reports to contracts — it’s all critical. But if that information i...
How to Implement BIM in a Small or Medium-Sized Architecture Firms

How to Implement BIM in a Small or Medium-Sized Architecture Firms

How to Implement BIM in Small-Medium Sized Architecture Firms - BIMPRO LLC USA

How to Implement BIM in a Small or Medium-Sized Architecture Firms

In the ever-changing world of architecture, small and medium-sized firms often find themselves facing the tough challenge of remaining competitive while operating with limited resources. Unlike large architecture companies, which may have bigger budgets and larger teams, smaller firms typically have fewer people and tighter financial constraints. This means that while you might not have the same resources, you can still thrive by making smart decisions about how to work more efficiently and adapt to new technologies.

One way to make a big impact is by implementing Building Information Modeling (BIM) in your firm. BIM is much more than just a piece of software—it’s a process that changes the way buildings are designed, documented, and constructed. By using BIM, you can streamline all aspects of your projects, from creating accurate designs to collaborating with your team and clients, to managing construction more smoothly.

For smaller architecture firms, the adoption of BIM offers a major advantage. While large architecture companies might have more resources and bigger teams, smaller firms are often more agile, able to adapt quickly to changes and new tools. BIM allows you to be efficient, accurate, and collaborative, helping you stay competitive without needing a large team or huge budgets.

This guide is designed to help you navigate the process of implementing BIM effectively in your firm, no matter your size. It will provide a step-by-step approach, offering practical tips on how to get started, what tools to use, and how to gradually grow your BIM capabilities. Whether you’re just beginning or looking to improve your existing workflows, this guide will show you how to leverage BIM to improve project quality, reduce errors, and enhance team collaboration. By following this process, your firm can compete with the larger players and open the door to more opportunities and growth.

What is BIM, and Why It Matters for Smaller Firms?

BIM, or Building Information Modeling, goes beyond just creating 3D models of buildings. It is a comprehensive digital process that allows everyone involved in the construction process—architects, engineers, designers, contractors, and facility managers—to plan, design, manage, and construct buildings using a single, cohesive system of computer-generated 3D BIM models.

What makes BIM so powerful is that it brings every part of the building—from the structure (walls, windows, doors) to the mechanical, electrical, and plumbing systems (MEP)—into the model. Each element is connected to a database containing essential information about the materials, dimensions, and performance characteristics. So, if a change is made to one part of the building, like adjusting the size of a wall, that change is automatically updated everywhere else in the model. This reduces errors, prevents repetition of work, and ensures consistency across all parts of the project.

For smaller firms, BIM is a great tool that can level the playing field. Often, smaller firms struggle to compete with larger companies that have more resources, but BIM allows smaller firms to work just as effectively. It helps you complete projects faster, reduces the chance of mistakes, and provides more precise planning. With BIM, your firm can also work more collaboratively with consultants and clients. Sharing digital models makes communication smoother, which leads to a higher quality and more efficient project overall.

Importantly, BIM is becoming a requirement for many public sector projects and larger private sector projects. As these types of projects now often require BIM deliverables, adopting BIM helps small firms stay competitive and eligible for these kinds of projects. Without BIM, small firms may miss out on opportunities that otherwise could have been within their reach.

Step 1: Define Clear and Realistic BIM Goals

Before jumping into selecting BIM software or starting any training, it’s important to first understand why your firm wants to adopt BIM. Take some time to ask yourselves questions like: Are you trying to improve drawing quality by reducing errors and inconsistencies? Do you want to reduce RFIs (Requests for Information) during the construction phase, which can cause delays and add costs? Or perhaps you’re aiming to win larger contracts that require BIM submissions as part of the bidding process? Defining these goals clearly gives your firm direction, helps keep your team focused, and provides a way to measure your progress and success as you move forward.

These goals could be technical, such as reducing clashes in the design or improving coordination between architectural, structural, and MEP elements. Or they might be procedural, like streamlining the workflow between design and construction teams to improve communication and efficiency. Additionally, your goals could be strategic, such as gaining a competitive edge in your market or positioning your firm as a leader in the industry. By understanding exactly what you want to achieve with BIM, you’ll be able to make more informed decisions.

Make sure to write these goals down and ensure every team member understands them. Having clear, defined goals will guide your decisions on choosing software, selecting training programs, and rolling out BIM across your projects. It helps ensure that everyone is working towards the same objectives, and it gives you a way to track progress and success as you go.

Step 2: Audit Your Current Tools and Workflows

Every firm has its own way of working, so it’s important to take a step back and understand your current workflow before diving into BIM. Start by looking at the tools you’re already using. Are you mainly working with AutoCAD or SketchUp? Do your computers have enough processing power to handle BIM software? And how are you storing your files—locally on your machines, or using cloud platforms like Dropbox or Google Drive?

Take some time to also think about your current challenges. Are you spending too much time redlining or marking up drawings? Do your consultants often ask for revisions or clarifications? These are the kind of issues that could be addressed with BIM. By understanding the problems you’re currently facing, you’ll be able to see where BIM can bring the most value.

This step is crucial because it ensures you’re not just jumping into BIM because it’s a trend, but because it’s a tool that will actually help solve real problems in your practice. Taking a close look at your workflow will help you figure out how BIM can fit in and make a real difference.

Step 3: Select the Right BIM Software

Choosing the right BIM software can feel like a big decision, especially when you’re working with a tight budget. There are a lot of options out there, and the best one for your firm depends on things like your firm size, expertise, and the types of projects you typically handle. Here are a few of the most popular options:

  • Autodesk Revit for architects is considered the industry standard. It’s a great choice for firms that need a wide range of features and want to work smoothly with consultants. Revit’s compatibility with other software makes it a solid option for most project types.
  • Graphisoft Archicad for architects is a great pick if your firm values a design-focused interface that’s easy to navigate. It’s a user-friendly tool that’s especially popular with architects and those who want a smoother design experience.
  • Vectorworks for Architect offers a more intuitive approach with both BIM and drafting tools built into one. It’s a good fit for firms looking for something flexible but still straightforward to use.
  • BricsCAD for Architects is more affordable compared to the others and uses DWG files, which is helpful if your team is transitioning from traditional CAD. It can be a good choice for firms that want to get into BIM without breaking the bank.

Before making your decision, take advantage of free trials or educational versions of the software to see how it works with a small project. As you test the software, pay attention to things like the user interface, the availability of training materials, and whether the software integrates well with the consultants you often work with. This hands-on approach will help you choose the right tool for your team.

Step 4: Assign a BIM Champion (or Two)

Instead of trying to get your whole team to adopt BIM all at once, focus on a smaller group to start with. Pick one or two people who can become your BIM Champions. These are the team members who are excited to dive in, learn the software, experiment with templates, and try out pilot projects. Over time, they’ll become the ones who lead the charge and help train the rest of the team.

Choose people who are curious, open to learning, and have a bit of patience. These qualities are key for handling the challenges that come with learning something new. Give them the time and resources they need to really explore BIM without feeling rushed. Let them experiment, and make sure they document their experiences—what worked well, what didn’t, and how they figured out the best workflows. These notes will be incredibly helpful when it’s time to bring the rest of the team on board.

By starting with just a few people, you’ll be able to build a group of BIM experts who can guide the rest of the team. This approach makes the whole transition smoother and less disruptive. It’s better to have a small group of skilled individuals who understand the system inside and out before rolling it out to the entire team.

Step 5: Start with a Small Pilot Project

Trying to implement BIM on all your projects at once can feel like too much. Instead, start small. Pick a project that’s easier to manage—like a single-family home or a minor renovation—and use it as a test case. This gives you the chance to get hands-on experience and figure out how BIM fits into your current workflow.

During this pilot project, experiment with different tasks. Try modeling your design, creating schedules, generating sheets, and working with consultants. As you go, keep track of how much time you spend on each task compared to using your usual CAD tools. This will help you see how BIM compares and where it can save time or improve accuracy.

Also, pay attention to what’s working well and what might need tweaking. This way, you’ll learn quickly and build confidence in your team. Once you’re comfortable, you’ll be in a better position to handle bigger, more complex projects down the road.

Step 6: Develop Simple BIM Standards and Templates

After you’ve completed your pilot project, it’s time to start shaping your BIM process more formally. Don’t worry about creating a huge, complex plan right away. Start small and focus on simple standards that will make things easier for your team.

You might want to set up things like:

  • Naming conventions for views and files: This helps keep everything organized and easy to find.
  • Template sheets: Standard layouts for your architectural drawings save time and ensure consistency.
  • Object libraries: A collection of commonly used architectural elements that everyone can use in their models.
  • Rules for model sharing: Clear guidelines on how and when to share your architectural 3D models with others.

Next, create a central project template that includes things like:

  • Consistent families (predefined groups of objects)
  • Schedules (for organizing data in the model)
  • View templates (to keep your drawings looking consistent)
  • Title blocks (the standard boxes for project details)

This will save time and help ensure that your models stay high-quality, even as your team grows. Store these templates in a shared location where everyone can access them. Remember, you don’t have to perfect everything right away. These standards can evolve over time, but having a starting point keeps your team aligned and working smoothly.

Step 7: Invest in the Right Hardware and Infrastructure

BIM tools are more demanding than basic drafting software, so it’s important to ensure your computer can handle them. To get the best performance, aim for machines with:

  • At least 16 GB of RAM: This will help your computer run smoothly even with large models.
  • A dedicated graphics card (like NVIDIA or AMD): BIM software uses a lot of graphics power, so having a good graphics card is key.
  • A modern multi-core processor (Intel i7 or higher): This helps with speed and efficiency, especially when working with complex models.

Additionally, using dual monitors can boost productivity. This allows designers to have models on one screen and documentation or plans on the other, making it easier to work faster and more efficiently.

Consider Cloud Storage or a Common Data Environment (CDE)

For easy file sharing and version control, you should think about using cloud storage or a Common Data Environment (CDE). These tools make it simpler for your team to collaborate and keep track of changes. Some good options includes Autodesk Construction Cloud, BIM 360, Dropbox Business, Trimble Connect, etc.

These cloud-based tools ensure everyone is working with the most up-to-date files, making team collaboration much smoother.

Step 8: Bringing in External Consultants and Streamlining Communication with BIM

Once your team feels comfortable using BIM, it’s time to bring in your external consultants—like structural engineers, MEP (mechanical, electrical, plumbing) engineers, and others—into the process. This is where BIM really shines!

You can share models with consultants using cloud-based collaboration platforms, which makes it easy for everyone to access and update the same information in real-time. Next, hold regular model coordination meetings where everyone—architects, engineers, and other key team members—can come together to review the models. This helps catch clashes or conflicts in the designs before construction even starts, so you don’t run into costly issues on site.

This approach has many benefits:

  • Fewer RFIs (Requests for Information): Since everyone is on the same page from the start, there are fewer misunderstandings, and fewer questions during construction.
  • Fewer Site Errors: With everything coordinated ahead of time, there are fewer surprises and mistakes when building begins.
  • Better Efficiency: The entire process becomes smoother and more organized, saving time and resources.

Even your clients will appreciate the difference. With BIM, they can see a clearer, more detailed view of their spaces, and understand things like construction schedules, sequencing, and costs much better. BIM is more than just a design tool—it’s a communication platform that keeps everyone on the same page, making the whole project run more smoothly.

BIMPRO is a professional BIM experts for delivering quality and precise Architectural BIM Services to architectural firms across the USA. 

Common Challenges and Practical Solutions

Making the switch to BIM can feel tricky at first, especially for smaller architecture teams that already have a lot on their plate. But don’t worry—these challenges are normal, and there are ways to work through them.

  1. The Learning Curve

BIM software can feel overwhelming in the beginning. There are lots of tools and new terms to learn. But like anything new, it gets easier with practice. Start small—maybe try making a basic room schedule or creating a simple 3D view. Celebrate those small wins. Over time, they add up and build confidence.

  1. Budget Worries

Let’s be honest—BIM software can be expensive. If your firm is working with a tight budget, you don’t have to buy the most expensive software right away. Try monthly subscription plans instead of paying all at once. You can also explore free or open-source tools like FreeCAD for basic modeling tasks. It’s better to start small than to not start at all.

  1. Resistance from Staff

It’s normal for people to feel nervous about change. Some team members might worry that learning BIM will make their job harder. The key is to show them how BIM can actually make their work easier—less rework, better coordination, and more time for creative design. Make training fun, helpful, and not overwhelming.

Remember, there’s no need to rush. It’s perfectly okay to take your time. What matters most is steady progress—not perfection. One step at a time, your team will get there.Conclusion: BIM is the Future—Start Small and Grow Smart

Conclusion: BIM is the Future—Start Small and Grow Smart

Starting with BIM (Building Information Modeling) in a small or medium-sized architecture firm might seem like a big step—but it doesn’t have to be stressful. If you take it one step at a time, use the right tools, and make a solid plan, you’ll soon see how BIM can help your team work better together, catch mistakes early, and deliver better results for your clients.

Begin by setting clear and realistic goals. Ask yourself: Why do we want to use BIM? Is it for better coordination, smoother client presentations, or easier revisions? Once you have your goals, focus on building BIM knowledge within your team. You don’t need everyone to be an expert right away. Start by training one or two team members and let them guide others as you move forward.

Next, try using BIM on just one small project. This will give you a chance to explore how it fits into your workflow, learn from real experience, and make changes before you roll it out on bigger projects.

Every firm works differently—so your BIM journey should match your firm’s unique needs. Don’t feel pressured to do everything at once. The key is to grow gradually, step by step.

And most importantly, remember: you don’t have to become a BIM master overnight. The goal is to keep learning and improving, so your firm stays creative, efficient, and ready for the future.

Read latest blogs

Why Revit MEP Modeling Services & MEP BIM Are Important in Modern Construction
June 3, 2026
In the past, constructing a building was a game of architectural blueprint supremacy. The structure was drawn, the concrete was poured, and then mechanical, electrical, and...
Revit vs AutoCAD: Which Tool Is Right for Your AEC Project in 2026
May 22, 2026
Picking the right software for your construction, engineering, or design project can feel a bit overwhelming. But when you look closely at Revit vs AutoCAD, the choice beco...
How BIM Is Transforming Data Center Design and Construction
November 26, 2025
Data centers today are among the most demanding and technically complex projects in the construction world. These buildings run the digital infrastructure of modern busines...
What Is Point Cloud to BIM and How Does It Reduce Project Risks?
November 26, 2025
In today’s construction and architecture projects, accuracy is very important. Even small measurement mistakes can cause design conflicts, budget issues, and project delays...
Revit Drafting: The Complete Guide to 2D Detailing in a BIM World
May 14, 2025
When we think of Revit, the first thing that usually comes to mind is 3D modeling — smart walls, floors, roofs, and intelligent building components. But behind every beauti...
How to Implement BIM in a Small or Medium-Sized Architecture Firms
May 8, 2025
How to Implement BIM in a Small or Medium-Sized Architecture Firms In the ever-changing world of architecture, small and medium-sized firms often find themselves f...
Common Data Environment (CDE) – All You need to Know

Common Data Environment (CDE) – All You need to Know

Common Data Environment (CDE) - BIMPRO USA

In any construction project, data is everywhere. From architectural drawings to material schedules, and from clash reports to contracts — it’s all critical. But if that information is scattered across multiple platforms or outdated by the time someone views it, then things can quickly go wrong. Teams may make decisions based on incorrect drawings. Contractors might build using old models. And that’s where delays, cost overruns, and rework creep in. This is exactly why the construction industry is turning to something called the Common Data Environment, or CDE. It acts as the central hub for managing and sharing project information. In this blog, we’ll explore what a CDE is, why it matters, how it works in BIM workflows, and how to start using it in your own projects.

What is a Common Data Environment (CDE)?

A Common Data Environment (CDE) is a centralized digital platform where all information related to a construction project is stored, organized, and shared. Think of it like a smart digital filing cabinet that’s accessible to everyone involved — architects, engineers, contractors, consultants, and clients. But it’s more than just a place to store documents. A CDE makes sure that every file has a clear version history, the right naming convention, and the appropriate level of access. So when someone opens a drawing or a BIM model, they’re always seeing the most up-to-date and approved version — not something from last month.

The main purpose of a CDE is to create a single source of truth for everyone. Instead of sending files back and forth over email or working from local copies, project teams can simply log in and access what they need. That means fewer errors, better coordination, and smoother project execution.

Why is CDE Important in Construction and BIM?

Construction is a highly collaborative industry. On most projects, there are dozens (sometimes hundreds) of people working together — each responsible for a different part of the job. Without a clear and consistent system for sharing data, it becomes incredibly easy for miscommunication to happen. For example, if a structural engineer is working off an outdated architectural drawing, their changes might not align with the current design intent. This results in clashes, delays, and extra costs.

In BIM workflows, this challenge becomes even more significant. BIM involves working with complex 3D models that hold a large amount of embedded data — from dimensions to material specifications to MEP connections. These models are regularly updated, often by multiple people. So, having a CDE ensures that everyone is looking at the same information, at the same time, in the same place. It supports better decision-making and reduces the risk of rework by giving project stakeholders immediate access to accurate data, whenever they need it.

What Does a CDE Include?​

A Common Data Environment includes much more than just a place to upload files. It offers several tools and features designed specifically for the needs of construction and BIM teams. First, there’s document management — this allows you to upload different file types (like PDFs, DWGs, RVTs, and spreadsheets) and sort them by type, discipline, or date. Advanced systems include metadata tagging, so each file is labeled with important information such as version number, status (like “For Review” or “Approved”), and author.

One of the most important features of a CDE is version control. This means every time a file is updated, the older version is saved and archived — and team members can view the entire revision history. That way, there’s no confusion about what’s been changed or who changed it. Additionally, CDEs allow for permission settings, which means different users can be given different levels of access. For example, a subcontractor may be able to view and download files but not edit or delete them. These tools help teams work more efficiently and keep the data secure.

How CDE Helps During Different Project Stages?

One of the biggest strengths of a CDE is that it supports the project from start to finish — during design, construction, and handover. In the design stage, architects and engineers can upload models and drawings for coordination. These files can be reviewed and commented on by other team members, who can mark up suggestions or request changes. Everything stays in one place, so there’s no back-and-forth email chains or missing feedback.

During the construction phase, the CDE becomes the go-to platform for site teams to access the latest construction documents, RFIs, shop drawings, and schedules. Project managers can issue updates in real-time, and field engineers can upload photos and progress reports directly from the site. This ensures that the work being done aligns with the most current information.

In the handover phase, a well-maintained CDE becomes a treasure trove for facility managers. All the final models, asset data, operation manuals, and warranties are stored and easy to access. This makes the transition from construction to building operation smooth and stress-free.

Benefits of Using a CDE

The benefits of using a Common Data Environment are hard to ignore. First and foremost, it reduces mistakes. When everyone is working from the same set of documents, there’s less chance of someone acting on outdated or incorrect information. That alone can save thousands — if not millions — in rework and delays.

Secondly, it improves transparency and accountability. You can see who uploaded a document, when it was changed, and what changes were made. There’s a full audit trail. This builds trust between team members and helps resolve disputes quickly if something goes wrong.

A CDE also makes collaboration easier and faster. Since everything is online and accessible from anywhere, people can work together even if they’re in different cities or countries. This is especially useful for international projects or firms with remote teams. And finally, using a CDE can help your project comply with international BIM standards, like ISO 19650, which are becoming more common in government and infrastructure projects around the world.

What Kind of Information is Stored in a CDE?

You might be wondering what types of information are actually stored in a CDE. The short answer is: everything related to the project. This includes:

  • 2D drawings and 3D BIM models created by architects, engineers, and contractors
  • Specifications, schedules, and bill of quantities (BOQ) that help plan and price the work
  • RFIs (Requests for Information) where contractors ask for clarification
  • Submittals, approvals, and reports that document decisions and progress
  • Meeting minutes, site photos, contracts, and health & safety records

Having all of this data in one place makes it easy to manage and find what you need when you need it.

CDE vs Traditional File Sharing Methods

Before CDEs, many teams relied on email, Dropbox, or local servers to share project files. While these tools were okay for basic file transfers, they lacked structure and control. For example, it was common to have three different versions of the same drawing saved in different folders, or for someone to work from a PDF that had already been revised twice.

A CDE solves these problems by making sure there’s always one current version of each file, clearly labeled and stored in the right folder. You don’t have to wonder if the file you’re opening is the latest one — the system tracks that for you. It also lets you control who can view or edit certain files, which helps prevent accidental changes. In short, a CDE is built for collaboration, while traditional file systems were built for storage.

Traditional vs CDE (Common Data Environment)

Popular CDE Platforms Used in the Industry

There are several software tools available that function as Common Data Environments. Autodesk Construction Cloud (ACC) is one of the most popular, especially for teams already using Revit or AutoCAD. It includes tools for document management, model coordination, and project tracking. BIM 360, also from Autodesk, is its predecessor and is still widely used.

Other popular platforms include Trimble Connect, which is known for its easy-to-use model viewer, and Oracle Aconex, which is used on many large infrastructure and government projects. Viewpoint for Projects offers strong tools for document control and compliance, while platforms like Dalux and Revizto are known for their simplicity and field-friendliness. The right CDE for your team depends on your workflow, budget, and level of technical experience.

How to Start Using a CDE on Your Project?

Getting started with a CDE doesn’t have to be difficult. First, choose the right platform based on your needs — consider things like cost, ease of use, and integrations with your existing tools. Once you’ve selected your CDE, the next step is to create a folder structure that’s easy to understand and matches your workflow. It’s also important to establish naming conventions so files are easy to sort and search.

Next, assign roles and permissions so everyone knows what they can do. For example, the architect might be allowed to upload design models, while a subcontractor might only have viewing rights. It’s also a good idea to provide training to all users so they’re comfortable using the system. And finally, connect your CDE to your BIM Execution Plan (BEP) so that all data workflows are aligned with your project goals.

Challenges in Adopting a CDE

Like any new technology, adopting a CDE can come with some challenges. The most common one is resistance to change. People who are used to emailing files or working from local drives may be hesitant to learn a new system. That’s why training and leadership support are important. Another concern is data security — especially with cloud-based CDEs. But most leading platforms offer strong encryption and access control to keep your data safe.

Other challenges may include the cost of software, the time needed to set up the system, and integration with older tools. However, these are usually short-term issues. Once your team is familiar with the CDE, you’ll start seeing real benefits in terms of efficiency, quality, and collaboration.

The Future of Common Data Environments

The future of CDEs is looking very promising. New technologies are being added every year. We’re seeing AI-powered features that can automatically detect clashes in models or suggest task deadlines based on project data. There’s also growing interest in digital twins, which are live, data-driven replicas of physical buildings. These are built using data stored in the CDE during construction.

OpenBIM is making it easier for different platforms and software tools to talk to each other. And mobile apps are helping site teams access and update project info right from the field. As construction becomes more digital, the CDE will play a central role in how projects are designed, built, and maintained.

Final Thoughts

If you’re still managing your project documents with email chains and shared drives, it’s time to move forward. A Common Data Environment brings order, control, and clarity to your construction project. It makes collaboration smoother, reduces costly mistakes, and ensures everyone is working with the right information.

In today’s fast-moving industry, having a CDE isn’t just a nice-to-have — it’s a must-have. It’s the foundation for a modern, digital construction workflow. And once you experience the difference, you’ll wonder how you ever managed without it.

Architectural Revit Modeling Services Single Family Apartments Project in New Jersey

Architectural Revit Modeling Services Single Family Apartments Project in New Jersey

Architectural Revit Modeling for Single Family Apartments Project in New Jersey

Our Revit architectural services played a critical role from design development through coordination. We created highly detailed and data-rich Revit models based on the architect’s concept drawings and project specifications.

  • Services Provided: Architectural Revit Modeling Services
  • Total Units: 12 single-family style apartments
  • Project Location: New Jersey
  • Stories: 2 stories per unit
  • Unit Type: 3-bedroom, 2.5-bathroom townhome-style apartments
  • Total Project Area: 18,000 sq. ft.
  • Average Unit Size: 1,500 sq. ft.

About Project

The Single-Family Apartment Project is a thoughtfully planned residential development designed to offer modern, comfortable living spaces within a serene neighborhood setting. This project comprises a collection of single-family-style apartment units, each crafted with a focus on space, natural light, and high-quality finishes.

Why Architect Choose us for Architectural Modeling Services?

  1. We made sure the 3D models were accurate and easy to build from, right from the start.
  2. By spotting design issues early, we helped avoid mistakes and rework later on.
  3. Our work made it easier for architects and engineers to work together smoothly.
  4. We created neat and well-organized Revit models that others could use easily.
  5. The visual models helped the client and city officials clearly understand the design.
Architectural Revit modeling services for a single-family apartment project in New Jersey

Let us know about your Architectural Modeling Services Requirements

Explore More BIM Projects

Architectural Revit Modeling for Single Family Residential Apartment Project in New Jersey, (NJ) USA

Architectural Revit Modeling for Single Family Apartments Project in New Jersey Our Revit architectural services played a critical role from design development …

Plumbing BIM Services for Comal ISD ES, New Braunfels, TX

Comprehensive Plumbing Coordination Services for Educational Infrastructure in Texas BIMPRO delivered detailed Plumbing BIM modeling and clash coordination services for the Comal …

Plumbing BIM Services for Weston S Laredo Multi-family Apartment in San Antonio, Texas - BIMPRO LLC

Provent Plumbing Modeling Services for Weston S. Laredo Project in San Antonio, TX BIMPRO provided the provent system modeling and clash coordination …

MEP BIM Modeling Services for Tesla Giga Factory Project in Austin, TX - BIMPRO USA

MEP BIM Services for Tesla Giga Factory in Austin, TX As a BIM Services provider based in Texas, BIMPRO was assigned with …

IFC and OpenBIM: What You Need to Know

IFC and OpenBIM: What You Need to Know

IFC and OpenBIM - BIMPRO LLC USA

IFC and OpenBIM: What You Need to Know?

In the modern AEC world, digital collaboration is essential. The process of designing, building, and maintaining structures involves numerous teams, software tools, and specialized workflows. IFC (Industry Foundation Classes) and OpenBIM are two core elements that enable these teams to work together, regardless of the software tools they use, without sacrificing the accuracy and integrity of the data.

These concepts are not just technical jargon—they are central to how the construction industry is evolving. Let’s dive deeper into what these terms mean, how they function, and why they are essential to the future of construction projects.

What is IFC (Industry Foundation Classes)?

IFC (Industry Foundation Classes) is a neutral and open file format developed by buildingSMART International for the exchange of data in a digital building model. It is used primarily within the BIM process to ensure that data can be shared across various software applications.

Why IFC Matters?

In simple terms, IFC acts as a bridge between different software applications. Architects, engineers, contractors, and others involved in a building project often use different software tools, but if those tools can’t talk to each other, collaboration becomes difficult. For example, a structural engineer may be using Autodesk Revit while the architect might prefer ArchiCAD. Historically, exchanging files between these platforms was challenging, often leading to data loss or errors. 

That’s where IFC comes in. IFC is designed to maintain the data integrity of building models and ensure that critical information, like dimensions, materials, structural components, and even energy performance data, can be shared and understood by different software.

An important thing to note is that IFC is not just a CAD file. It’s a data-rich model format that holds information not only about the geometry of a building but also about its functional characteristics—like fire resistance, thermal performance, and cost estimations.

How IFC Works?

When an IFC file is created, it contains an abstract representation of a building’s physical components and the relationships between them. Unlike CAD files that are primarily visual, IFC files contain deep metadata—each element in the file is tagged with specific data. For example, an IFC file for a door could include its size, material, supplier, fire rating, and installation requirements.

IFC works by using classes and objects. Each class represents a building element, such as walls, windows, doors, etc., and each object within that class contains the detailed properties of that element. For instance, an object for a window may specify its size, material (e.g., aluminum frame), and any associated thermal or acoustic properties.

This level of detail is essential because it allows for much more than just a geometric representation. It enables teams to analyze and collaborate on the building’s performance, not just its shape.

What is OpenBIM?

OpenBIM is a philosophy, a movement within the AEC industry, advocating for the use of open standards like IFC to enable better collaboration. In the traditional world of proprietary BIM tools, each software vendor controls the formats their software uses. OpenBIM flips that model by promoting interoperability—the idea that software programs from different vendors should be able to communicate with each other seamlessly.

Key Principles of OpenBIM

Open Standards: OpenBIM relies on non-proprietary, universally accepted standards, with IFC being the most well-known example. Open standards ensure that data can be accessed, used, and understood by anyone, now and in the future.

Interoperability: One of the key goals of OpenBIM is to ensure that different software tools can work together seamlessly. Whether you’re using Revit, ArchiCAD, Tekla Structures, or any other BIM tool, OpenBIM makes it possible for everyone to work from the same set of information, regardless of their software preferences.

Collaboration: OpenBIM emphasizes open collaboration between all project stakeholders, such as architects, engineers, contractors, and owners. The key here is that no one is restricted by the software tools they use—everyone can work together on the same model, share data, and access updates in real time.

Long-term Access: OpenBIM ensures that the data is not locked into a specific software ecosystem. This is particularly important for long-term facility management and for projects that need to last for many decades, as it guarantees future generations will be able to access, update, and modify the model.

What are the benefits of IFC and OpenBIM?

IFC and OpenBIM bring a lot of important benefits to the construction and design industry, especially when it comes to working with different people and software. Here is the simple breakdown of their benefits:

  1. Works Across Different Software

One of the biggest benefits of IFC and OpenBIM is that they allow different software to talk to each other. Architects might use ArchiCAD, engineers might use Revit, and contractors might prefer Tekla or Navisworks. Normally, these programs don’t work well together. But when they all export or import files using the IFC format, everyone can share and view the same model without needing to switch tools. This makes communication much smoother across the whole project team.

2. No More Being Stuck With One Software

IFC gives you freedom. In the past, once you started a project in one software, you were stuck with it. If you wanted to switch, you’d often lose data or have to redo your work. With IFC, that’s not the case. You can move your project from one tool to another without losing information. This means you’re not tied down to one brand or subscription—you can choose what works best for you and your team.

  1. Makes Teamwork Easier

OpenBIM promotes better collaboration. When everyone can see the same model and work with the same information, it reduces confusion. Instead of passing files back and forth and hoping they line up, all team members can contribute to one shared digital model. This keeps everyone on the same page, which saves time and avoids costly misunderstandings later in the project.

  1. Keeps Your Data Safe for the Future

IFC is an open and non-proprietary format, which means it’s not owned by any software company. This is great for long-term projects or future building upgrades. Even if the software you used becomes outdated or goes out of business, your IFC files will still be readable. This helps protect your work and keeps it usable for many years.

  1. Helps Catch Mistakes Early

Using IFC and OpenBIM makes it easier to check the project model for errors before construction begins. Tools like Solibri or Navisworks or Revizto can read IFC files and run clash detection to find problems, such as pipes running into beams or walls overlapping. Fixing these issues during the design phase is much cheaper and faster than fixing them on site.

  1. Saves Time and Money

When everyone is working with accurate and up-to-date information, it reduces the chances of rework and delays. You avoid doing things twice or making changes late in the process. This leads to faster decision-making, fewer errors, and more efficient construction. In short, OpenBIM helps your project run more smoothly and saves money in the long run.

  1. Helps with Rules and Regulations

More and more governments and public projects are now requiring the use of IFC and OpenBIM. This is because open formats make it easier to review and manage project data. If your team is already using these standards, it becomes easier to qualify for public or international projects and follow local building regulations.

  1. Makes Facility Management Easier

Once the building is finished, the IFC model can still be very useful. It can contain information about equipment, materials, room sizes, maintenance schedules, and more. Facility managers can use this model to operate and maintain the building more effectively. This saves money over time and keeps the building in better shape.

  1. Increases Transparency

OpenBIM makes it clear who did what and when. Since all information is openly shared and recorded, it’s easier to track decisions and changes. This builds trust among project partners and helps avoid disputes. Everyone knows what’s happening and has access to the same information.

  1. Keeps You Ready for the Future

Finally, adopting IFC and OpenBIM now helps you stay ahead in the industry. As technology continues to grow, the push for open standards will only increase. By using them today, you’re preparing your team to handle future projects, tools, and client expectations with confidence.

What are the benefits of IFC and OpenBIM

Challenges of Using IFC and OpenBIM

While OpenBIM and IFC offer a lot of great advantages, like better collaboration and freedom from software lock-in, they’re not without a few bumps in the road. Just like with any technology, there are some challenges you might run into when using them in real-life projects.

One of the common problems is software compatibility. Even though IFC is meant to be a universal format, not every software handles it the same way. Some programs might not fully support all parts of an IFC file, or they might display things incorrectly. For example, a wall created in one software might look different or lose some details when opened in another. This can lead to confusion, missing data, or even mistakes in the project if the information doesn’t come through the way it was intended.

Another issue is file size and performance. IFC files can get really big, especially on large and detailed projects. When you have a model with thousands of elements—walls, floors, furniture, MEP systems—it all adds up. These heavy files can slow things down, especially if the computer or the software isn’t built to handle such complex models smoothly. This might make navigation clunky or even crash the program sometimes, which can be frustrating during tight deadlines.

There’s also a bit of a learning curve involved. If your team is used to working only in one software like Revit or ArchiCAD, switching to OpenBIM workflows can feel unfamiliar at first. Understanding how IFC works, how to export and import files properly, and how to troubleshoot issues can take some time. It’s not overly complicated, but it does require a bit of training or hands-on experience to get comfortable with it—especially when dealing with advanced coordination or data-rich models.

Lastly, there’s the challenge of lack of standardization. Even though IFC is an open standard, there are actually different versions of it—like IFC2x3 or IFC4—and not every project team uses the same one. On top of that, some teams only use specific parts of IFC, depending on their needs. So, when two different teams exchange models, their versions or interpretations might not align perfectly. This can lead to inconsistencies or gaps in the data, which kind of defeats the purpose of having a shared format in the first place.

Who Should Use IFC and OpenBIM?

When it comes to working on building projects, a lot of different professionals are involved—architects, engineers, contractors, and facility managers. Each of them plays a big role at different stages of the project. But here’s the thing: they don’t always use the same software. That’s where IFC (Industry Foundation Classes) and OpenBIM come in. These tools are like a common language that helps everyone share information without worrying about which software they’re using.

Architects should definitely use IFC and OpenBIM. Why? Because it allows them to send their 3D design models to other team members without any headaches. Imagine you’re an architect using ArchiCAD, and your structural engineer is working in Revit. Normally, that might cause issues. But with IFC, you can both share and view the model clearly, without losing any of the details. It helps architects keep their design intent intact, no matter who’s looking at the file.

Now let’s talk about engineers—whether they’re structural, mechanical, electrical, or civil. Engineers often need to work closely with architects and coordinate with other teams. Using OpenBIM allows them to share their models, run clash detection, and do analysis, even if they’re using different tools. For example, a mechanical engineer can send a model with all the ducts and pipes, and a structural engineer can check it to make sure nothing clashes with beams or walls. That’s teamwork made easier.

Contractors and builders also benefit a lot from OpenBIM. During construction, they need access to detailed and accurate models to understand what needs to be built. With IFC files, they can see everything in one place, from materials to dimensions. It helps them plan better, avoid mistakes, and keep the project on track. They don’t have to worry about what software the model was made in—OpenBIM makes sure it works for them too.

Finally, facility managers and building owners have the longest relationship with the building. Even years after construction is done, they still need to maintain and update the building. With IFC, they can receive a digital twin of the building that doesn’t depend on a specific software. This means they can access all the building information—like room sizes, equipment, and maintenance schedules—without any compatibility issues. It gives them flexibility and long-term control over their property.

Conclusion

In today’s construction landscape, where collaboration, efficiency, and accuracy are paramount, IFC and OpenBIM are fundamental to ensuring the smooth execution of projects. By embracing these open standards, you’re ensuring that your team can work together more effectively, using the best tools for the job while maintaining data integrity across different platforms.

Incorporating IFC and adopting the OpenBIM approach into your workflow will not only future-proof your projects but also create a more transparent, efficient, and collaborative process from design through to facility management.

BIM for Architectural Drawings: Smarter, Faster, Better

BIM for Architectural Drawings: Smarter, Faster, Better

BIM for Architectural Drawings - BIMPRO USA

Architectural Drawings and How BIM Can Help

Architectural drawings are at the core of every construction project. They are not just sketches or technical sheets; they are the language architects use to communicate their design ideas to clients, contractors, engineers, and everyone involved in the building process. These drawings translate concepts into physical structures, guiding the entire construction journey from start to finish.

But producing architectural drawings, especially for large or complex projects, is no small task. It involves accuracy, coordination, and continuous updates. Traditionally, this process could be slow, repetitive, and prone to errors. That’s where Building Information Modeling, or BIM, changes the game. BIM offers a smarter, faster, and more coordinated way of producing architectural drawings—redefining how we design and build today.

What are Architectural Drawings?

Architectural drawings are the visual and technical representations of a building’s design. These drawings serve multiple purposes—communicating design intent, securing approvals, coordinating with different teams, and guiding construction. There are various types of architectural drawings, each serving a unique role in the project lifecycle.

For example, floor plans show the layout of spaces like rooms, corridors, and circulation paths. Elevations give a look at the external appearance of a building from different sides. Sections offer a sliced-through view of the building, helping us understand how different levels and spaces relate vertically. Then there are detail drawings, which zoom in on construction elements like wall joints or window frames. And let’s not forget schedules, which list components like doors, windows, finishes, and materials—all essential for procurement and execution.

Each of these drawings must be precise and consistent across the board. A mistake in a single view can lead to confusion, delays, or costly errors during construction.

Top View BIM Model for architectural drawings - BIMPRO USA

Traditional Process: The Old Way of Doing Architectural Drawings

In the past, architectural drawings were created either by hand or using 2D CAD software. While CAD was a step forward from hand-drafting, it still treated each drawing as a separate file or view. For instance, if you moved a door on the floor plan, you had to remember to adjust it in every elevation, section, and schedule manually. This led to a lot of repetitive work, and worse—if you missed something, it could cause inconsistencies and errors down the line.

Coordination with structural and MEP (Mechanical, Electrical, Plumbing) disciplines was also challenging. Each discipline worked in its silo, and clashes were often discovered only during construction. That meant time-consuming RFIs, rework, and budget overruns.

How BIM Transforms the Architectural Drawing Process

BIM, short for Building Information Modeling, introduces a revolutionary approach. Instead of separate, disconnected drawings, BIM creates a centralized, intelligent 3D model of the building. All architectural drawings—floor plans, elevations, sections, schedules—are automatically generated from this model. They’re not just drawings; they’re live views of the building data.

Let’s say you move a wall in the BIM model. That change instantly reflects in the floor plan, elevation, and even the room area schedule. No need to go into each view and update manually. This real-time coordination saves hours of work and ensures consistency across all deliverables.

BIM also enables parametric design, where building elements like walls, windows, and doors carry information. You can tag a door once, and its size, type, and material can automatically populate in the door schedule. This level of intelligence dramatically improves accuracy and efficiency.

BIM Software for Architectural Drawings

When it comes to creating architectural drawings with speed, accuracy, and intelligence, BIM software has become the go-to tool for architects around the world. These programs go beyond just drawing lines—they help you build an actual 3D model of your design, where every wall, window, and door knows what it is, where it’s placed, and how it connects to everything else. From that model, you can automatically generate floor plans, elevations, sections, schedules, and even realistic renderings—all without having to redraw anything over and over again.

One of the most popular BIM tools is Autodesk Revit. It’s widely used in the architecture, engineering, and construction (AEC) industry, and for good reason. Revit lets you model your building in 3D and produces all your 2D architectural drawings straight from the model. If you change something—like move a wall or change a door type—every related drawing updates instantly. That’s a huge time-saver and keeps everything consistent.

Another strong contender is Graphisoft ArchiCAD. It’s especially loved for its intuitive interface and smooth 2D-3D workflow. Like Revit, ArchiCAD allows you to generate all your architectural drawings from a single model. It’s lightweight, easy to use, and works great for both residential and commercial projects.

Then there’s Vectorworks Architect, which combines strong design features with BIM capabilities. It’s particularly good for architects who want more creative control and artistic flexibility while still benefiting from a smart BIM environment. You can model in 3D, produce clean drawings, and even explore early-stage design ideas all in one place.

Allplan is another option, known for its precision and strength in construction detailing. It’s often used in Europe and is great for complex or large-scale architectural work that demands high accuracy in the documentation phase.

Lastly, if you’re just starting out or working on smaller-scale projects, BricsCAD BIM and SketchUp with BIM plugins can be great entry points. They’re simpler but still offer the ability to create models and extract basic drawings and schedules.

Each of these tools has its own strengths, but they all aim to make architectural drawing more efficient, connected, and accurate. Instead of creating each sheet manually, you build a digital twin of your building—and the drawings come to life from there. It’s faster, smarter, and helps you stay focused on what really matters: the design.

Ready to Upgrade Your Architectural Drawings with BIM?
Let our experts help you bring your designs to life—faster, smarter, and with zero errors. Get in Touch with Us

How BIM Helps Create Each Type of Architectural Drawing

  1. Floor Plans

BIM software like Revit or ArchiCAD generates floor plans directly from the 3D model. As you design walls, doors, windows, and furniture in 3D, the 2D plan is automatically generated and updated. Dimensions, tags, and room names can also be linked directly to the model data.

  1. Elevations

You don’t need to draw elevations manually anymore. Just cut a view from the model and boom—you’ve got an accurate elevation. Want to change the window style? Update it in the model, and the elevation changes instantly. BIM also handles shadows, material rendering, and even entourage if needed.

  1. Sections

Like elevations, sections are cut directly from the model. This is a huge time-saver. It also means your section will always reflect exactly what’s in your plan—no more discrepancies.

  1. Reflected Ceiling Plans (RCPs)

Creating RCPs in BIM is almost effortless. Lights, HVAC diffusers, ceiling grids—they’re all modeled in 3D. You just cut a reflected view and adjust visibility settings. The coordination between MEP and architectural elements becomes seamless too.

  1. Site Plans

BIM tools help create site plans that include topography, building footprints, landscaping, and utilities. You can even import real-world survey data or geolocation to make the plan more accurate.

  1. Detail Drawings

Details like wall sections, window sills, or foundation joints can be extracted from the model and enhanced with 2D drafting. You get the best of both worlds—automated base drawings with hand-drawn finesse where needed.

  1. Schedules

This is one of BIM’s superpowers. Door, window, and finish schedules are generated automatically from the elements placed in the model. And they’re live—so if you remove a door in the model, it vanishes from the schedule too. No more forgetting to update schedules manually.

Section View BIM Model for architectural drawings - BIMPRO USA

Benefits of Architectural Drawings using BIM

  1. Smarter Drawings with Linked 3D Models

Instead of traditional 2D drafting, BIM lets you create architectural drawings that are directly linked to a 3D model. So when you make a change in the model—say, move a wall or adjust a floor level—the drawings update automatically. No need to chase changes manually across 20 different sheets.

  1. Consistency Across All Views

Plans, sections, elevations, and details all come from the same model. That means you don’t have to worry about one view saying something different than another. BIM ensures all drawings are in sync, reducing coordination errors.

  1. Faster Revisions and Design Updates

Architectural designs evolve fast. BIM makes revisions smoother and quicker. Instead of redrawing everything, you just tweak the model and regenerate the drawings. Huge time saver, especially on tight deadlines.

  1. Accurate Quantities and Takeoffs

With BIM, your drawings aren’t just lines—they carry real data. You can generate door schedules, window counts, and material quantities straight from the model. This makes cost estimation and procurement more precise and reliable.

  1. Better Collaboration with Engineers and Consultants

Since BIM is model-based, architects, structural engineers, and MEP consultants can work on the same platform (or linked models). That means better coordination and fewer clashes on site. Your architectural drawings can also include references to other disciplines for a more complete picture.

  1. Improved Design Visualization

BIM tools let you generate quick 3D views, walkthroughs, and renderings directly from your architectural model. Clients and stakeholders can understand the design better than with flat 2D drawings, making approvals faster.

  1. Code Compliance and Clash Detection

BIM allows you to integrate code checks and run clash detection. For example, you can verify corridor widths, fire exits, or ADA compliance while generating your architectural drawings. It’s like having a built-in checker before you submit for review.

  1. As-Built and Facility Management Ready

Architectural drawings created in BIM can be easily converted to as-built drawings after construction. Plus, they can feed directly into facility management systems, providing long-term value beyond just the design phase.

  1. Version Control and Documentation History

BIM platforms like Revit or BIM 360 track every change. You can roll back, compare versions, or check who changed what and when. This makes documentation management way more transparent and easier to audit.

  1. Sustainability and Performance Analysis

BIM-based architectural models can be used to analyze energy performance, daylighting, and other sustainability factors. These insights can then be reflected in the drawings—for example, showing optimized window sizes or shading devices.

Are you looking for Accurate, Coordinated Architectural Drawings for Your Next Project?
Discover how our Architectural BIM services can streamline your workflow.

Conclusion: Why BIM is the Future of Architectural Drawings

Architectural drawings are essential—but producing them the traditional way can be tedious and error-prone. BIM brings a fresh, intelligent, and streamlined approach. It eliminates manual repetition, ensures coordination, enhances collaboration, and brings the entire building to life—on screen—before a single brick is laid.

For architects, BIM is more than just a tool—it’s a smarter way of working. It allows them to focus more on design, creativity, and solving real-world problems, while the software takes care of coordination, accuracy, and documentation.

Whether you’re designing a home, a hospital, or a high-rise, using BIM for architectural drawings isn’t just helpful—it’s becoming essential in today’s fast-moving construction world.

Say Goodbye to Manual Redrawing and Inconsistencies in Architectural Drawings
Partner with BIMPRO for BIM-powered architectural drawings that do the heavy lifting for you.